|
I've been playing with my striping tape recently, it produces some really effective nail art with limited technical difficulty and is extremely versatile. I thought I'd show you a little photo blog of my latest mani using both striping tape and ombré effect. Firstly, get your materials together. Make sure your nails are clean, filed and ready to go. It's advised to apply a good base coat first however i'm naughty and don't usually. Be better to your nails than I am, people! 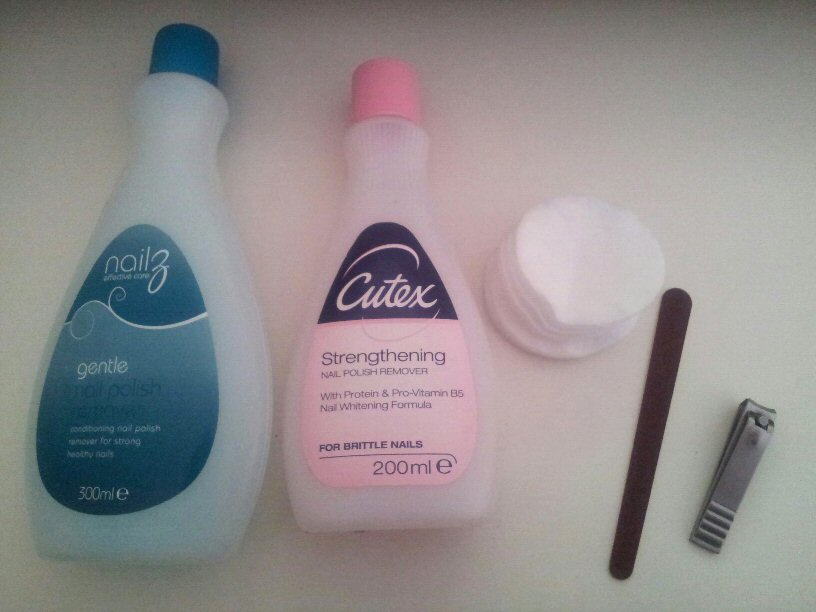

Next, apply a base colour. This helps your ombré nails look evenly spread. I chose gold but other popular choices when creating an ombré nail is white or black depending on the colours chosen. I find it's best to chose a varnish that has pretty great coverage with just one coat, to avoid having heaps of product on your nail. Often if you have too many layers of varnish, it'll just peel off after a few days. That sucks. Ok, now wait for your nails to dry. 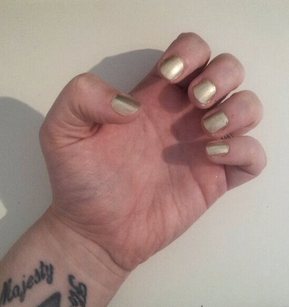
Once dry, grab your sponge. This is an old washing up sponge, fine in texture but foundation sponges work great as well. Paint the two colours of varnish horizontally on to the sponge how you wish them to appear on the nail. Quickly, press the sponge on to the chosen nail as if you are sponge painting on to paper. During this step, I always feel like I'm three and thoroughly enjoying messy play at pre-school! It takes a bit of practice, you have to dab a few times and WILL get a messy finger around your nails. There are various methods of reducing the excess on your fingers (Vaseline, cello tape) but hey, it's only varnish and it comes off, so again I'm naughty and I don't bother. Be better to your fingers than I am, people! Don't forget to leave your accent finger plain gold and wait for your nails to dry. 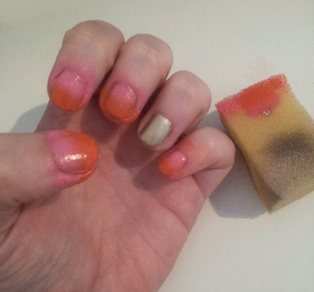
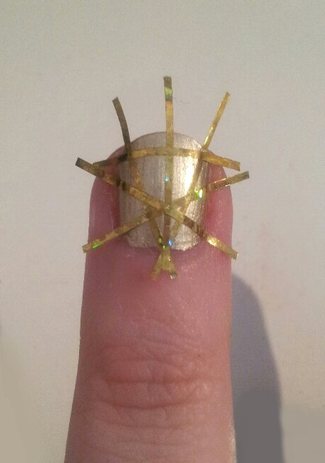
For this mani, I only wanted an accent finger in stripes - so I chose which finger (ring) I wanted to prep and went ahead and cut some tape. I find it easiest to cut off a good few lengths and stick them to my fingertip or wrist, then I can pick and chose where I want to place each one without having to stop each time to cut more lengths. 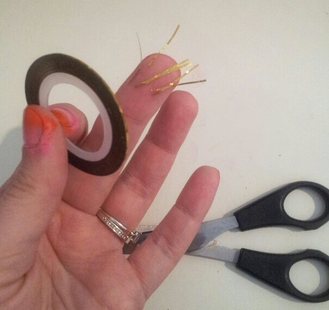
Once you have placed your striping tape on to your accent nail in the desired pattern, paint over it with your chosen colour. I debated doing ombré over this too but I decided to stick with plain orange this time, to make it stand out a little more. Whilst you're waiting for this to dry, clean up around your other nails. I use a cotton bud dipped in nail varnish remover and a Barry M nail varnish remover pen for the really close edges for a nice sharp finish. Look, a nice bit of Vulcan for you. 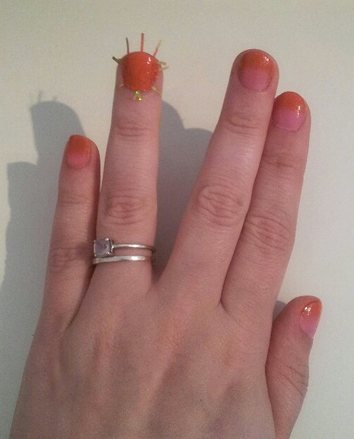
Once you're all cleaned up around your ombré nails and your top colour over you striping tape is dry, gently pull off the striping tape, strip by strip. Make sure you try and take them off in the order opposite to how you put them on (last to first) as this will make peeling easier. All that needs to be done now, is to put an ace top coat over your creations, let it dry... and you're done! 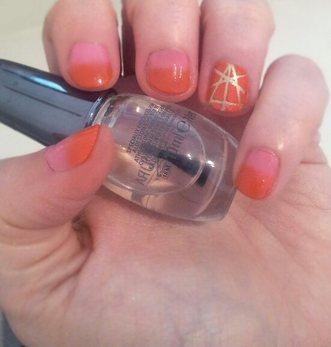
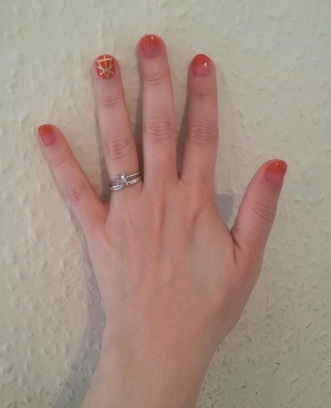
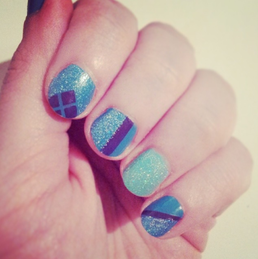 I also created this last week, which was popular over on IG. I really love the diamond effect on my index finger and am thinking of doing a mani based around this next week.
If you have a go at these or have another creation with striping tape/ombré to share, let me know, I could feature you here!
0 Comments
Leave a Reply. |

Who is Julie?30 something, mother of two gorgeous boys, lover of one gorgeous husband, perpetually living in a dream world full of wine, chocolate and artsy crafty things.    Archives
February 2018
Categories |
 RSS Feed
