|
Hi lovelies! I thought I’d write up a little nail art tutorial. I got given some nail tape from a friend and decided to give it a whirl, documenting as I go along. First, there are so many designs you can do with nail tape! Have a think of what you’d like to do before deciding on a pattern and colours. I always scour instagram and Google images for ideas and colour combinations before taking the plunge. Today I decided to go for a rainbow effect under black, with a black chalky accent nail. Here’s how I achieved it. After removing my old scraps of varnish, I cleaned my hands and nails with soap and water and applied my base coat. Whilst this was drying, I chose which colours I wanted for my first layer of rainbow effect colours. I lined them up making sure the colours looked great together and would have a nice flow. 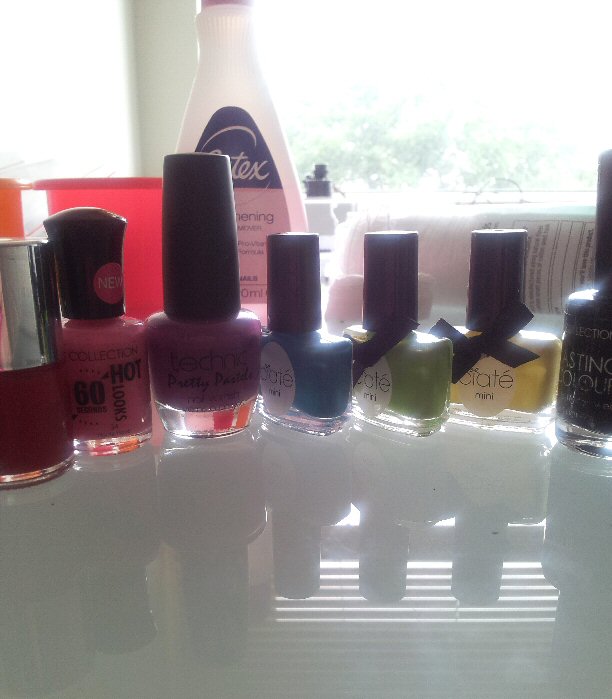
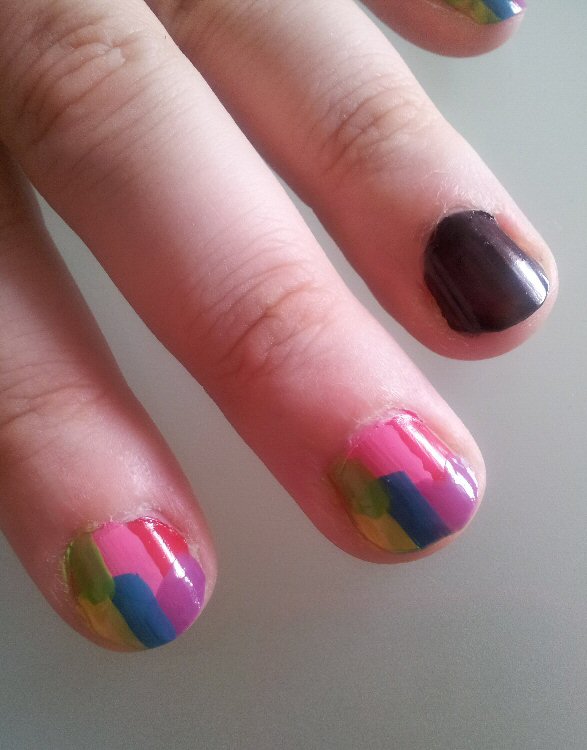
I then took each colour one by one and painted a splodge on each nail. Now, splodge as I’m sure you know, isn’t really a technical term but it sums up this technique pretty well! You don’t have to be super careful with lines and shapes, just as long as you end up with all your chosen colours on your nail that’s all that matters at this stage. Wait for your nails to dry. 
Next, grab your striping tape. This cute stuff can be bought online from eBay from about a squillion shops for dead cheap. No particular brand is better than another, it’s basically just a low tack very thin masking tape. I prefer to work out how many strips I will need for my pattern per finger and pre-cut them - sticking them to my table as I go along, ready for me to take off and apply to my nail. It saves trying to cut out a load of strips from the reel when you’re half-covered on your fingers. Make sure to leave enough at the end to make the tape easy to peel off. 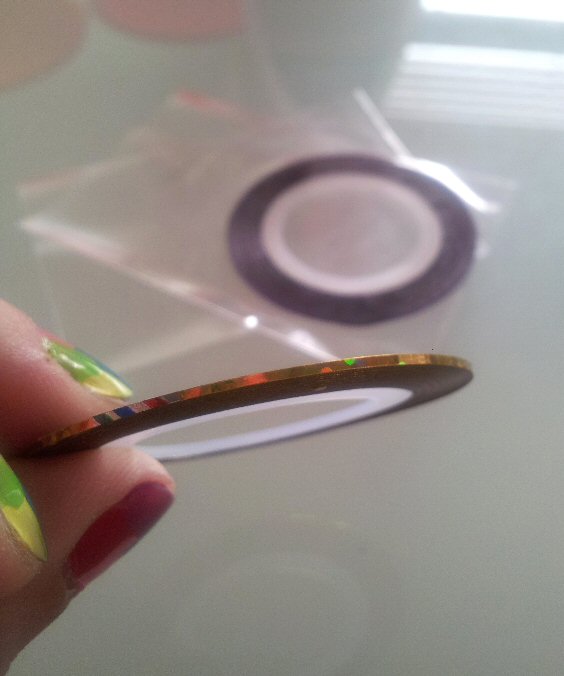
Place your tape in the desired pattern of your choice. I’ve gone for a criss-cross pattern on mine today but you could do horizontal or vertical stripes, one stripe on its own, random placement… whatever takes your fancy. 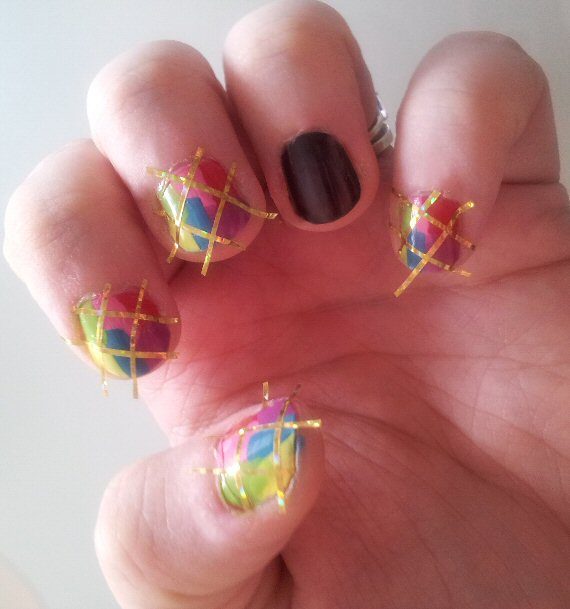
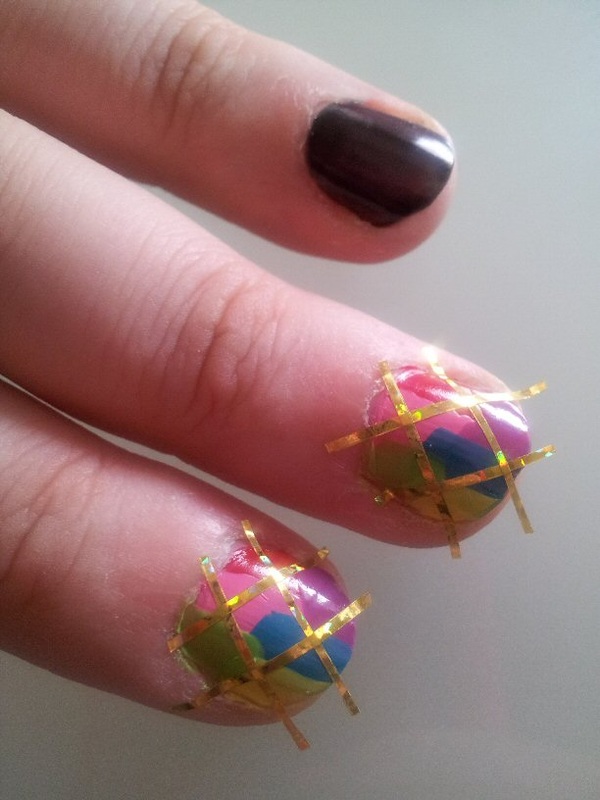
Don’t worry about any messy edges yet, there’ll be plenty of time to tidy up once the final effect has dried. Once you’re happy with all of your tape placement, grab the colour you want to go over the top. I have chosen a black here as I think it will work really well with the bright colours popping out underneath when the tape is taken off. Take care not to pile your nail full of colour, just one or two light coats depending on how opaque your top layer of varnish is, will suffice. Wait for your nails to dry. 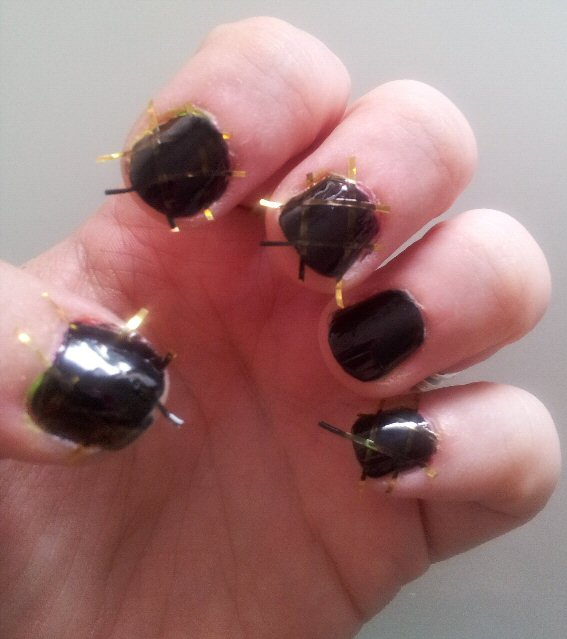
Carefully and gently peel off your tape pieces, one by one. If you layered your tape as I did in a criss-cross they will be interlocked, so make sure you remove the top tapes first, moving down to the bottom ones, to avoid smudging or pulling them all up in one go. Once all of your tape is removed, you should see your first base of colour splodges showing from underneath! 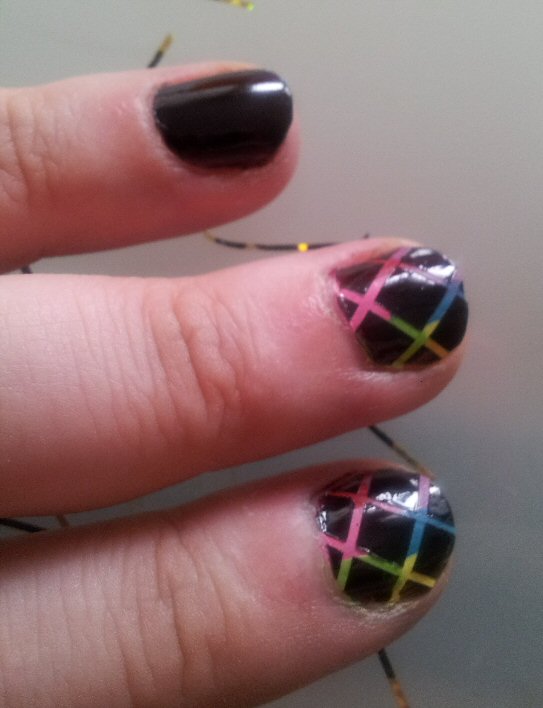
Finally, finish off your look with a good quality top coat and decorate your accent finger as desired. I have gone for a chalk dust effect on mine. You can then tidy your edges with a cotton bud or cleaner - I use Barry M Nail Corrector Pen, which has replacement nibs and a gorgeous smell compared to your average nail varnish remover. Job done! 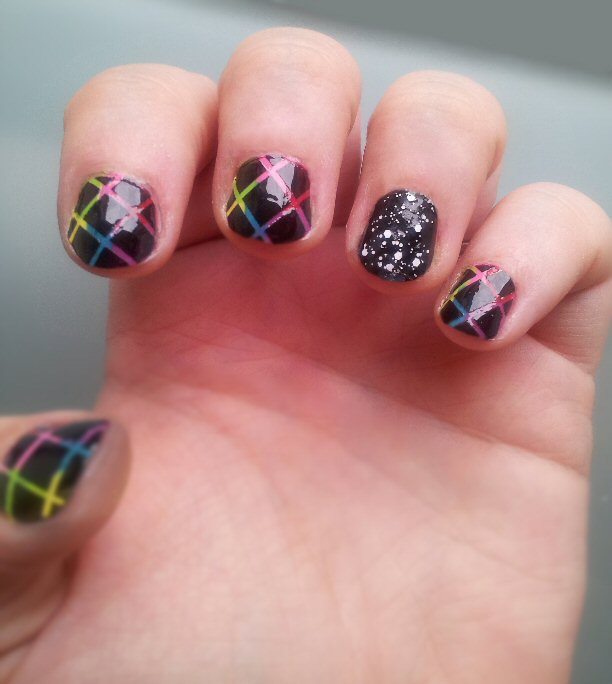
This look reminds me of my childhood! It brings back memories of brightly coloured clothes, tacky headbands, chalk and blackboards at school, scribbling with pastels on the warm tarmac in summer... I'm really pleased with how it came out. I hope you’ve enjoyed this little tutorial. If you give it a go, I’d love to see the results! Equally, if you have any requests just let me know.
1 Comment
In the 9 years i've been living in and around Beckenham, i've noticed our wonderful little town loves a good old-fashioned fair and market. We've had seasonal fun, local school-based frivolties and overseas foodies, all of which have been a great success. There's something about Beckenham that welcomes the warm, traditional joy a fair can bring; whether it's bonding over a hot toddy, trying not to laugh as your little one screams to get off of the ride he's begged to go on for the last FOURTY-FIVE MINUTES or just a chance to sit back, enjoy and take stock for a wee while. 
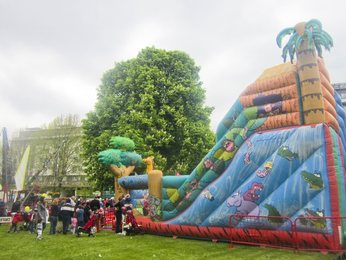
On Saturday 18th May, Market On The Green took place, on the, aherm, green. This time round Beckenham was host to local produce and craft Kent-based companies, including some scrummy food and drink, on stage entertainment, Morris dancers, stilt walkers and fairground rides. 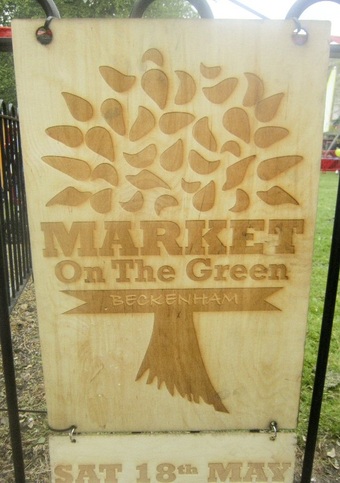
The aromas flowing from the food stalls were mouth-wateringly tempting from the moment i stepped off of the bus and made my way to the Green. I had my two kids and was a little concerned with the sheer amount of people i could see streaming in and out of the area, however, everything was superbly placed that customer flow was very easy. We decided to have a good old look round before deciding what to purchase, as there was so much to choose from and see. 
The weather was lovely, warm yet a little overcast to take the edge off. The trees had little pullovers in case they got chilly. Quite thoughtful of the organisers! 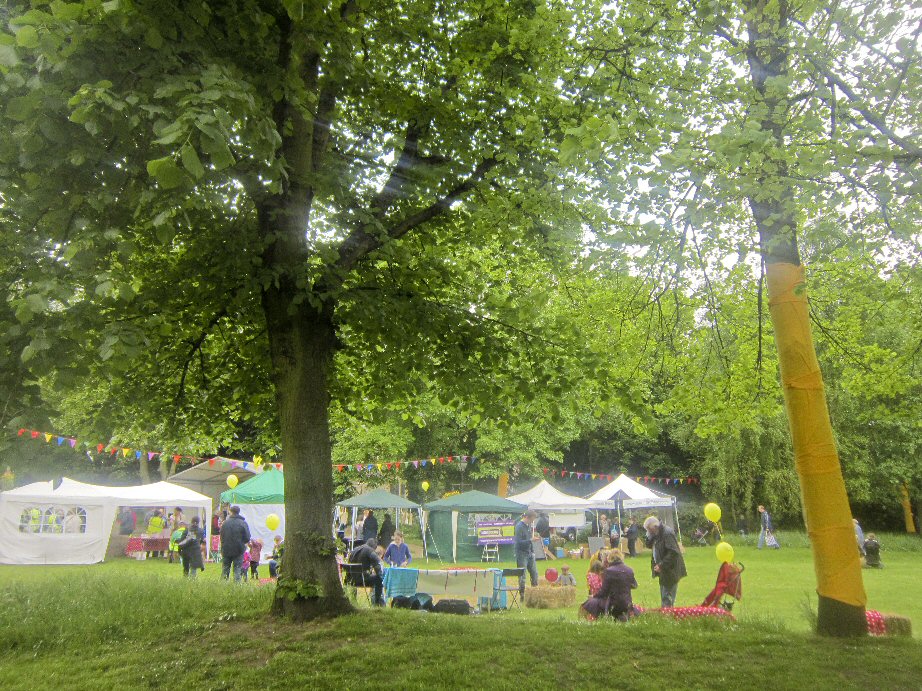
Whilst wandering around i bumped into a few friends, my parents and the gorgeous Lynda from Beckenham's very own award-winning hair salon, Baccarat. Everyone had a smile on their face and were enjoying the delights that these great local businesses were offering us under brightly coloured canopys and tempting tasters. After buying some delectable cupcakes from Munchkin Kitchen, we headed over to the Howards Of Kent stall. 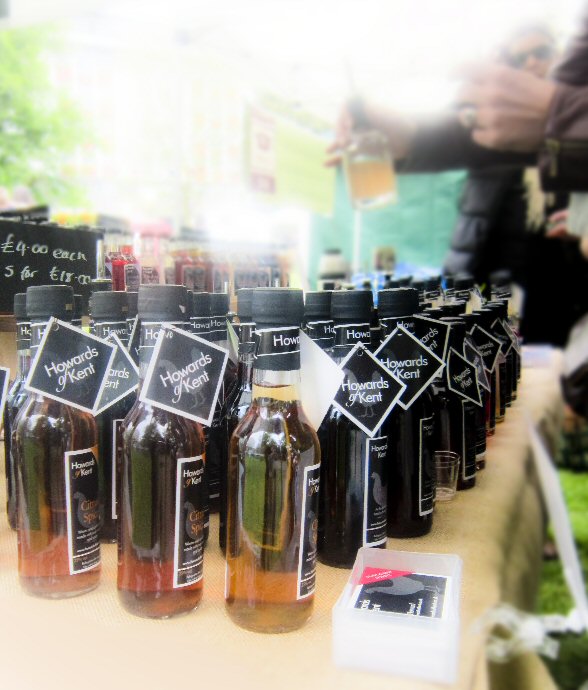
I have known Howards Of Kent's very own Vodka Lady on Twitter for some time yet have always missed her at tweetups and other local markets. It was really lovely to finally touch base with her, have a little natter (as the stall was extremely busy, rightly so!) and pick up some absolutely delicious vodka. 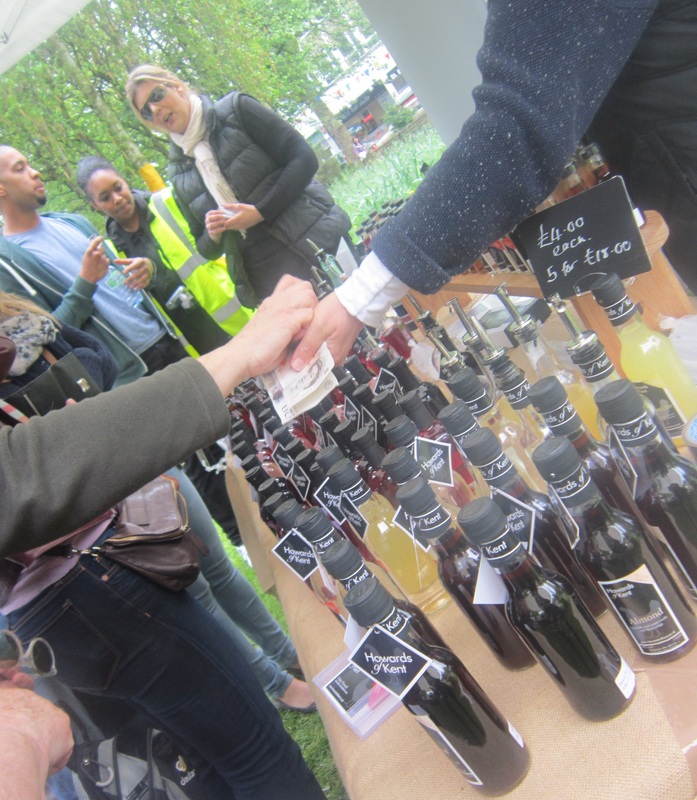
The lovely Vodka Lady herself says 'They say if life gives you lemons, make lemonade. Well life gave me lemons but I decided to make Limoncello instead and it was delicious!'. Believe me, it is delicious. I was lucky enough to win a small sampler of this tastebud tingling vodka over on Facebook. The difference between shop bought 'flavoured Vodkas' and Howards Of Kent vodka based fruit drinks is immense. All fruits used are fresh and natural, no hidden nasties, it makes such a difference. The intense flavours and richness of their drinks are just something else. 
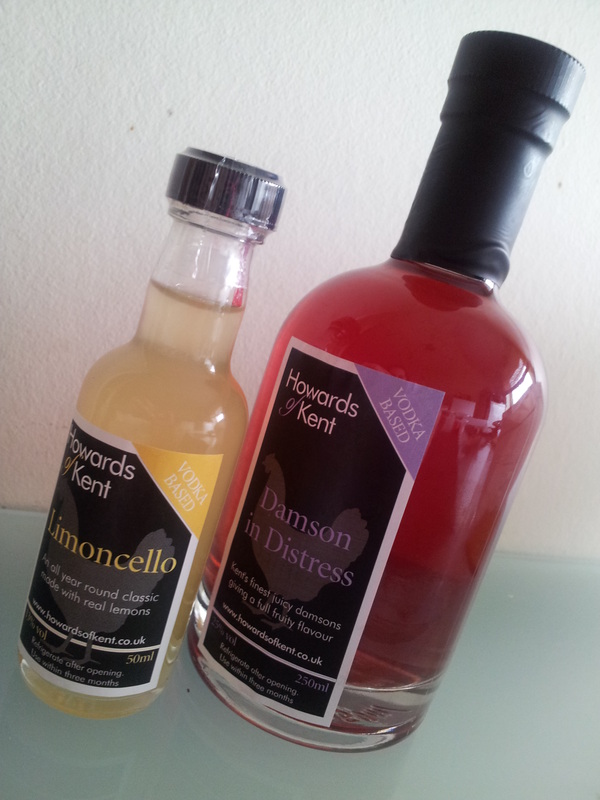
Whilst picking up my Limoncello win, i bought a Damson too. I am now
excitedly looking forward to catching them at another fair soon to make some more purchases! I have since used about a third of the bottle in shot form, carbonated drinks and fresh fruit juice. I highly recommend Howards Of Kent as a great local, individual company selling something naturally naughty, which will genuinely make you turn your head away from any other Vodka based drink. Myself and my boys had a great afternoon at Market On The Green in Beckenham. I urge you to keep a look out for any other events happening here and to pop along. You can meet some great people, buy some fantastic products and, most importantly, see trees wearing pullovers. |
Who is Julie?30 something, mother of two gorgeous boys, lover of one gorgeous husband, perpetually living in a dream world full of wine, chocolate and artsy crafty things.    Archives
February 2018
Categories |
 RSS Feed
