|
Hi lovelies! I thought I’d write up a little nail art tutorial. I got given some nail tape from a friend and decided to give it a whirl, documenting as I go along. First, there are so many designs you can do with nail tape! Have a think of what you’d like to do before deciding on a pattern and colours. I always scour instagram and Google images for ideas and colour combinations before taking the plunge. Today I decided to go for a rainbow effect under black, with a black chalky accent nail. Here’s how I achieved it. After removing my old scraps of varnish, I cleaned my hands and nails with soap and water and applied my base coat. Whilst this was drying, I chose which colours I wanted for my first layer of rainbow effect colours. I lined them up making sure the colours looked great together and would have a nice flow. 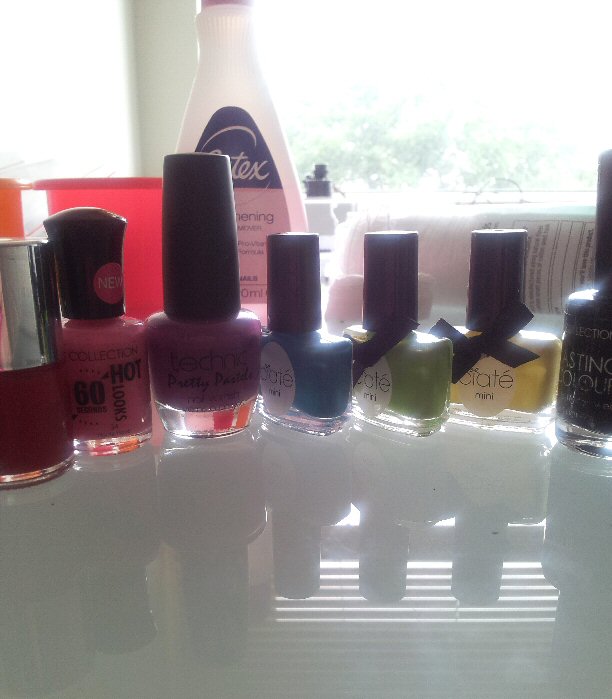
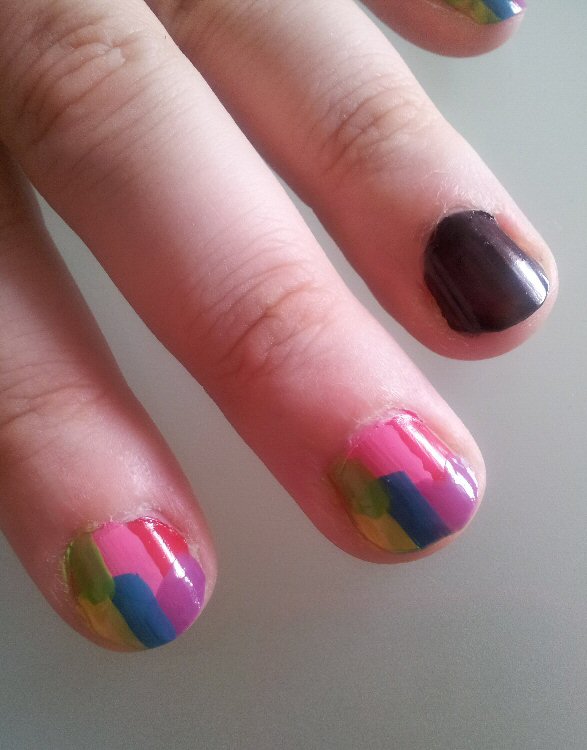
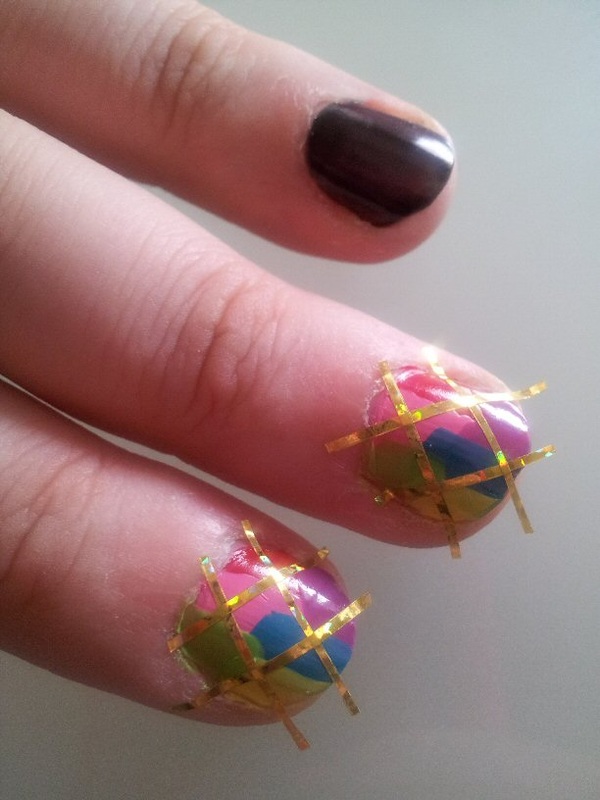
I then took each colour one by one and painted a splodge on each nail. Now, splodge as I’m sure you know, isn’t really a technical term but it sums up this technique pretty well! You don’t have to be super careful with lines and shapes, just as long as you end up with all your chosen colours on your nail that’s all that matters at this stage. Wait for your nails to dry. 
Next, grab your striping tape. This cute stuff can be bought online from eBay from about a squillion shops for dead cheap. No particular brand is better than another, it’s basically just a low tack very thin masking tape. I prefer to work out how many strips I will need for my pattern per finger and pre-cut them - sticking them to my table as I go along, ready for me to take off and apply to my nail. It saves trying to cut out a load of strips from the reel when you’re half-covered on your fingers. Make sure to leave enough at the end to make the tape easy to peel off. 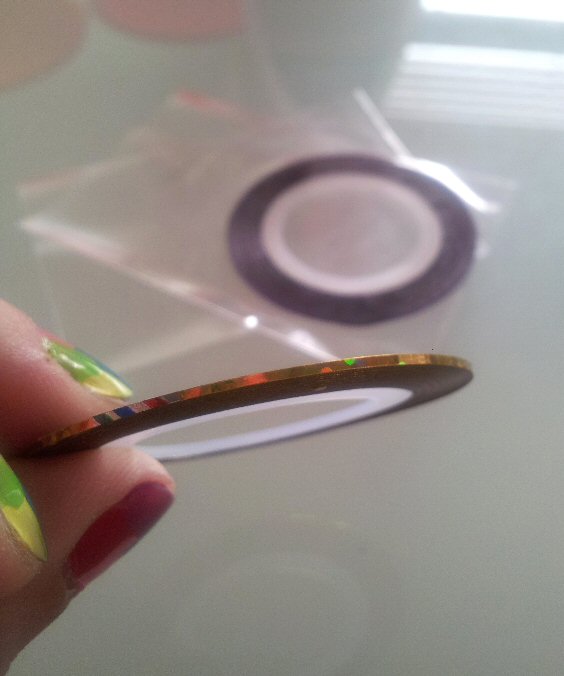
Place your tape in the desired pattern of your choice. I’ve gone for a criss-cross pattern on mine today but you could do horizontal or vertical stripes, one stripe on its own, random placement… whatever takes your fancy. 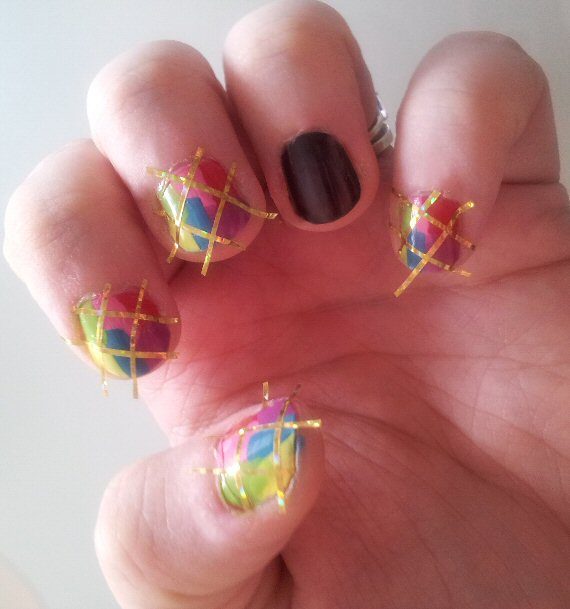
Don’t worry about any messy edges yet, there’ll be plenty of time to tidy up once the final effect has dried. Once you’re happy with all of your tape placement, grab the colour you want to go over the top. I have chosen a black here as I think it will work really well with the bright colours popping out underneath when the tape is taken off. Take care not to pile your nail full of colour, just one or two light coats depending on how opaque your top layer of varnish is, will suffice. Wait for your nails to dry. 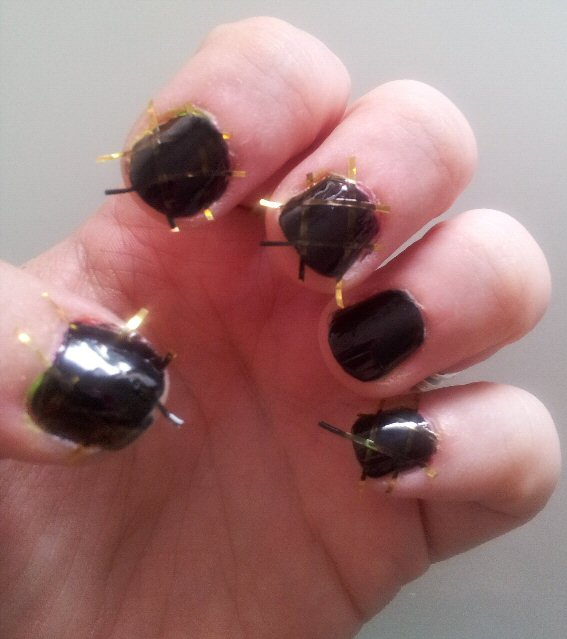
Carefully and gently peel off your tape pieces, one by one. If you layered your tape as I did in a criss-cross they will be interlocked, so make sure you remove the top tapes first, moving down to the bottom ones, to avoid smudging or pulling them all up in one go. Once all of your tape is removed, you should see your first base of colour splodges showing from underneath! 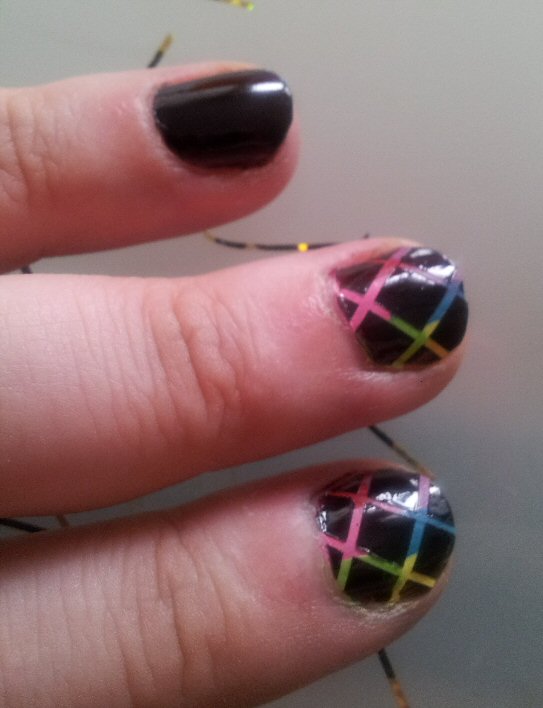
Finally, finish off your look with a good quality top coat and decorate your accent finger as desired. I have gone for a chalk dust effect on mine. You can then tidy your edges with a cotton bud or cleaner - I use Barry M Nail Corrector Pen, which has replacement nibs and a gorgeous smell compared to your average nail varnish remover. Job done! 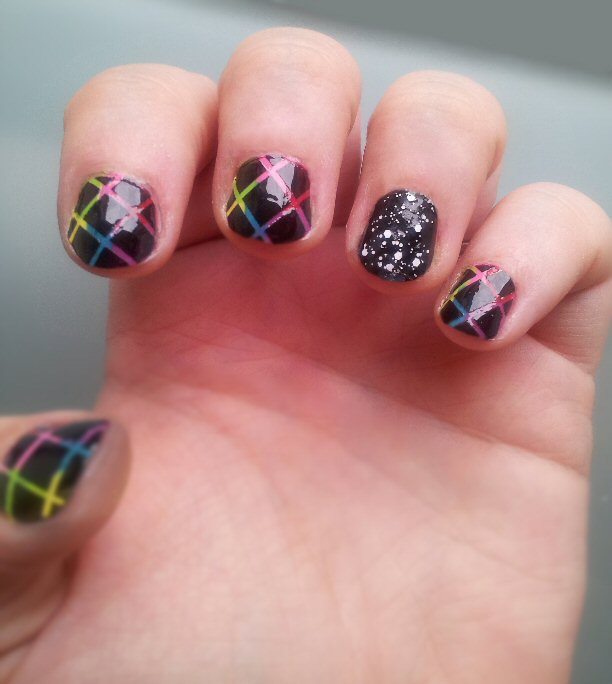
This look reminds me of my childhood! It brings back memories of brightly coloured clothes, tacky headbands, chalk and blackboards at school, scribbling with pastels on the warm tarmac in summer... I'm really pleased with how it came out. I hope you’ve enjoyed this little tutorial. If you give it a go, I’d love to see the results! Equally, if you have any requests just let me know.
1 Comment
|
Who is Julie?30 something, mother of two gorgeous boys, lover of one gorgeous husband, perpetually living in a dream world full of wine, chocolate and artsy crafty things.    Archives
February 2018
Categories |
 RSS Feed
